Setting Up Farms in Skudonet Community Edition
In Skudonet Community Edition, a Farm is a set of rules that define how traffic is received and forwarded to backend servers. Farms can operate at Layer 4 (L4xNAT) or Layer 7 (HTTP/HTTPS), and they offer options for health checks, persistence, and SSL termination.
In this article, we’ll walk through the steps to create and configure a basic HTTP farm to balance web traffic between two backend servers.
🧱 What is a Farm?
A Farm is a logical configuration block that defines:
- The protocol and port to listen on
- Backend servers and their priorities
- Load balancing algorithms (e.g., round robin, least connections)
- Optional health checks
- SSL/TLS settings for HTTPS farms
🖥️ Prerequisites
- Skudonet CE is installed and running
- Access to the Skudonet web interface
- One or more backend web servers (e.g.,
192.168.1.28)
🚀 Step-by-Step: Create an HTTP Farm
1. Login to Skudonet Dashboard
Visit:
https://your-skudonet-ip:444
Login with your root credentials.
2. Go to Farms
- Click on the “Farms” tab on the left menu
- Click “Create New Farm”
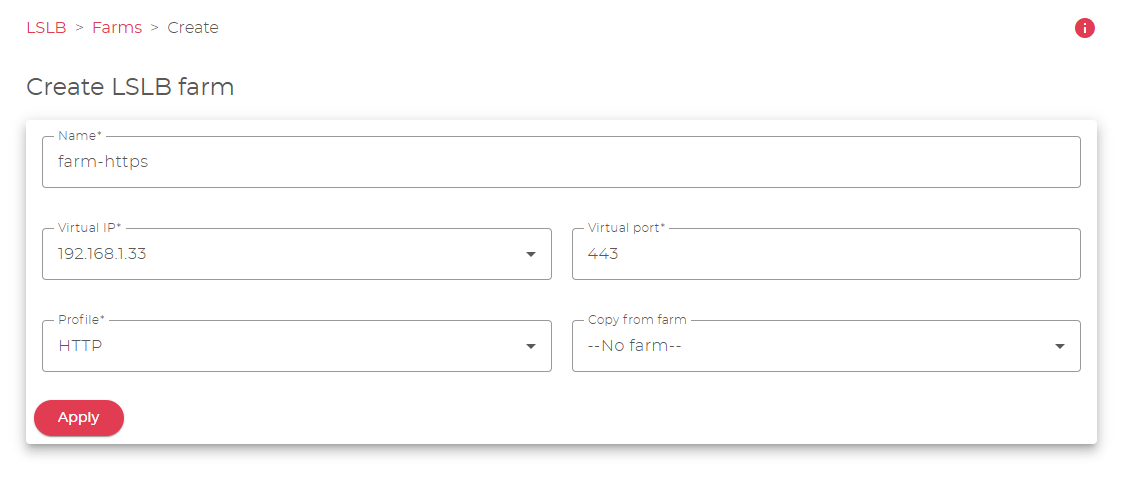
3. Enter Basic Details
- Name:
farm-http - Profile:
HTTP - Virtual IP: e.g.,
192.168.1.33(bind eth0 interfaces) - Virtual Port:
80
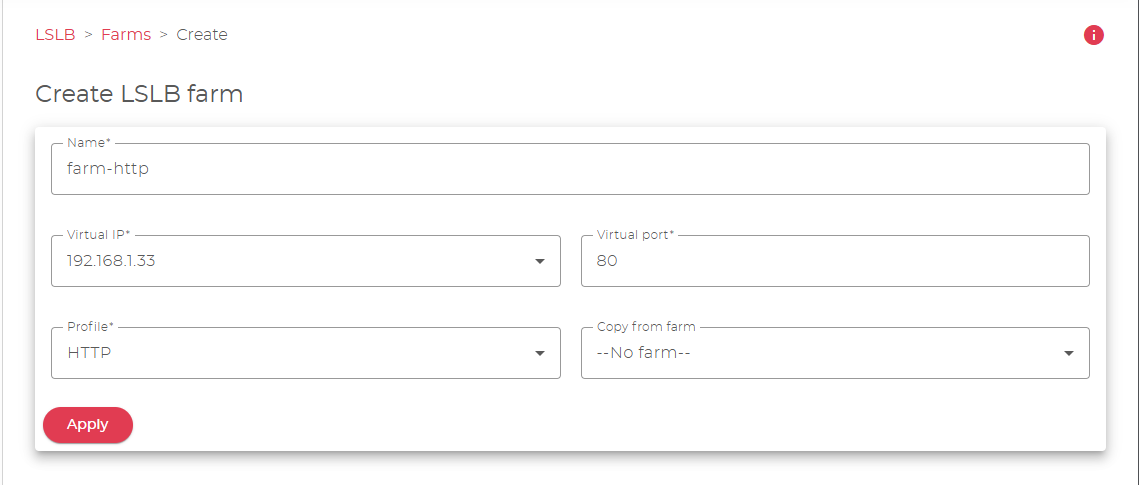
Click “Apply”. Retry the step to make HTTPS farm
4. Add Service
After saving, click on the farm name to configure it.
- Add new “Services”, add the “Service Name”
- Edit the Services, configure the Virtual Host
- Enable the
HTTPSbackend to use HTTPS


5. Enable Health Checks / Farmguardian (Optional but Recommended)
- Under “Service” properties
- Farmguardians:
check_tcp
- Farmguardians:
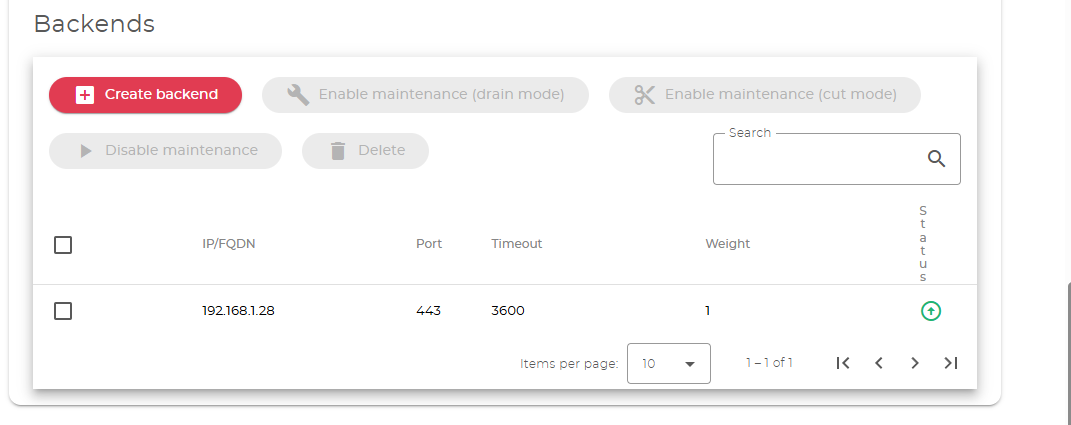
6. Add Backend Servers
- Under “Backends”, click “Add Backend”
- IP:
192.168.1.28 - Port:
443 - Timeout:
3600 - Weight:
1
- IP:

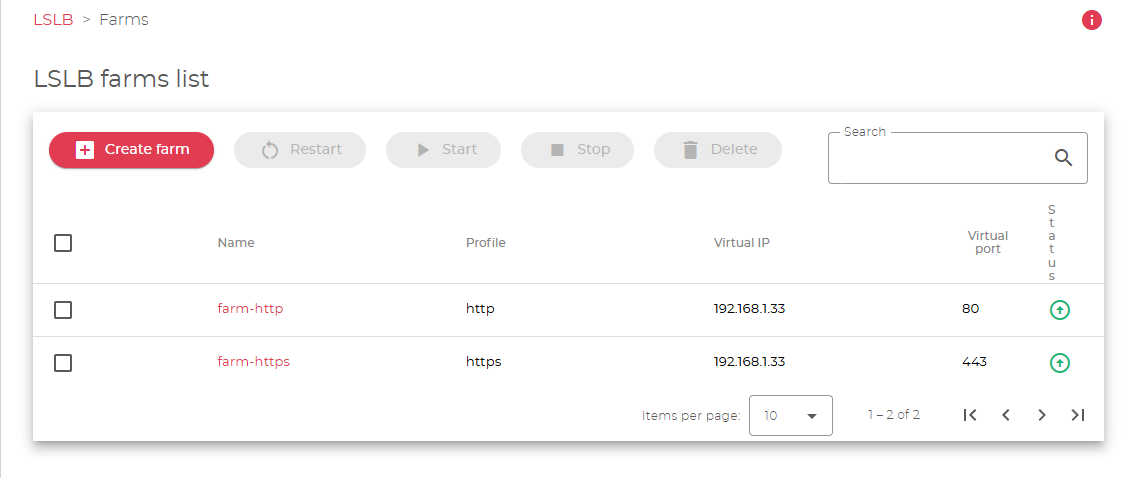
6. Start the Farm
- Go back to the “Farms” list
- Click the “Power icon” to start
farm-httpandfarm-httpsas well.
7. Activate the Rules
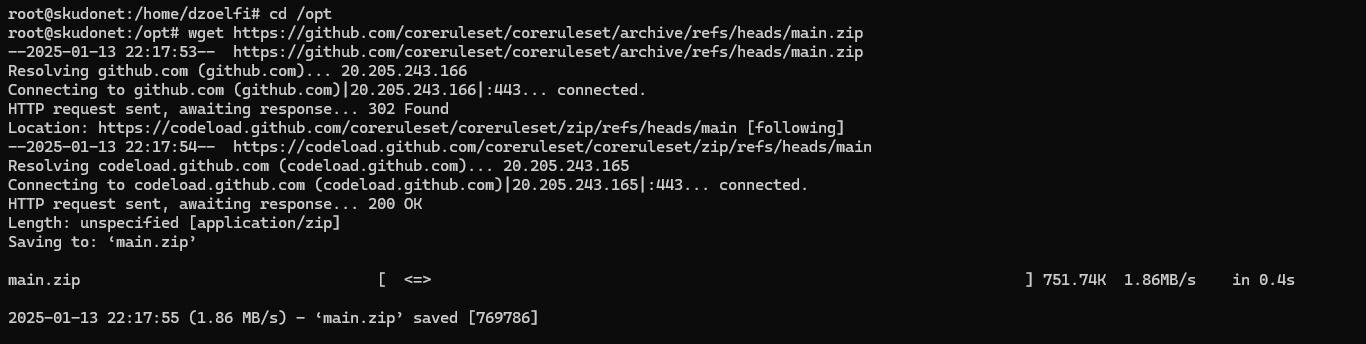
- Remote your “Server” via
SSH - Open
/optdirectory, download and unzip coreruleset fromgithub - Copy the files to directory
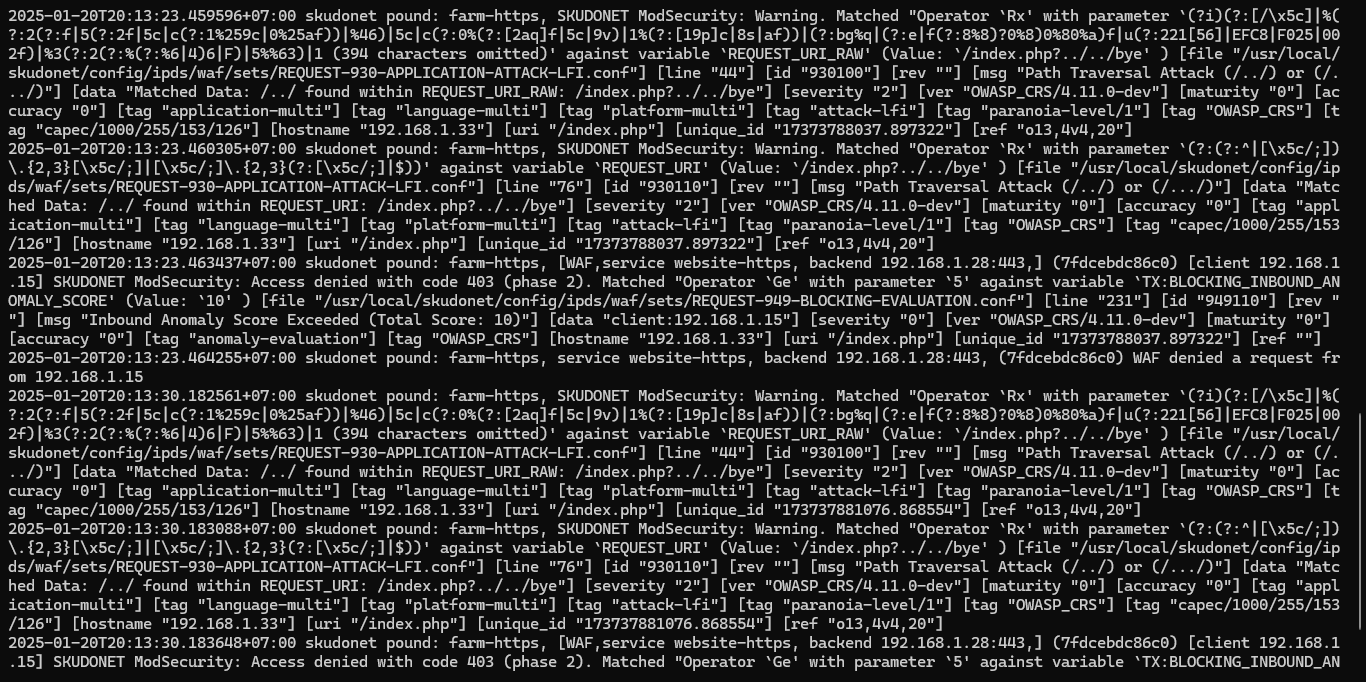
/usr/local/skudonet/config/ipds/waf/sets - Copy the
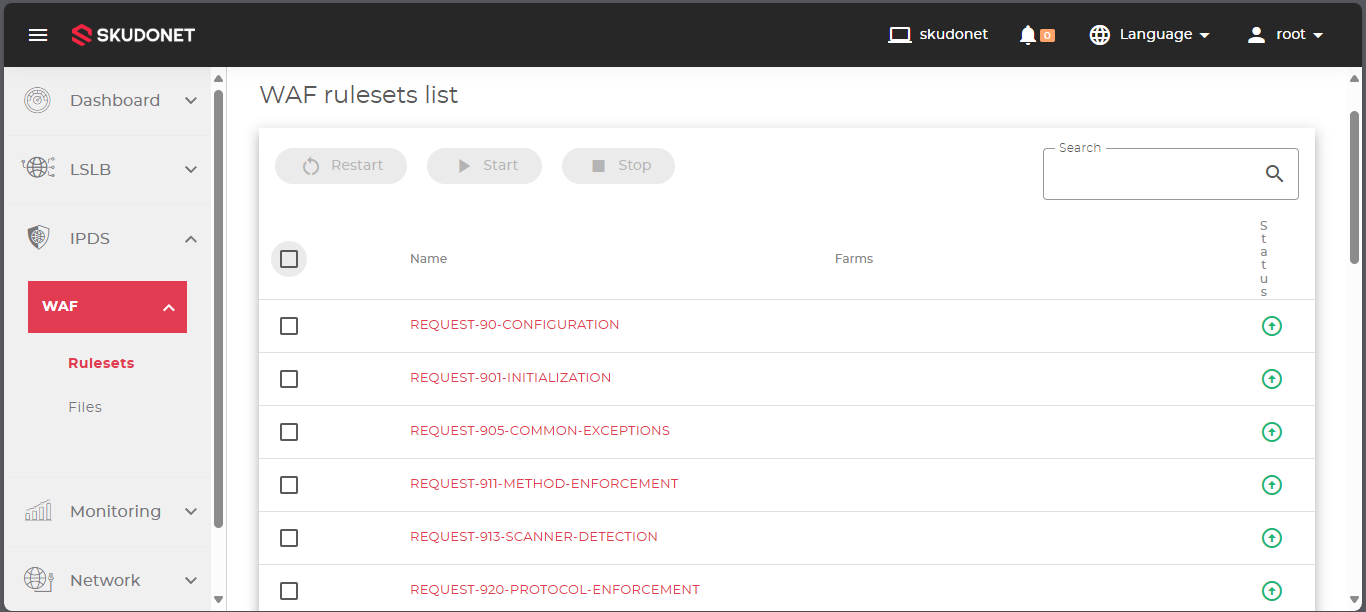
configurationrule to the same directory - Checklist all rules, and Click the “Start” to start
WAF ruleset.

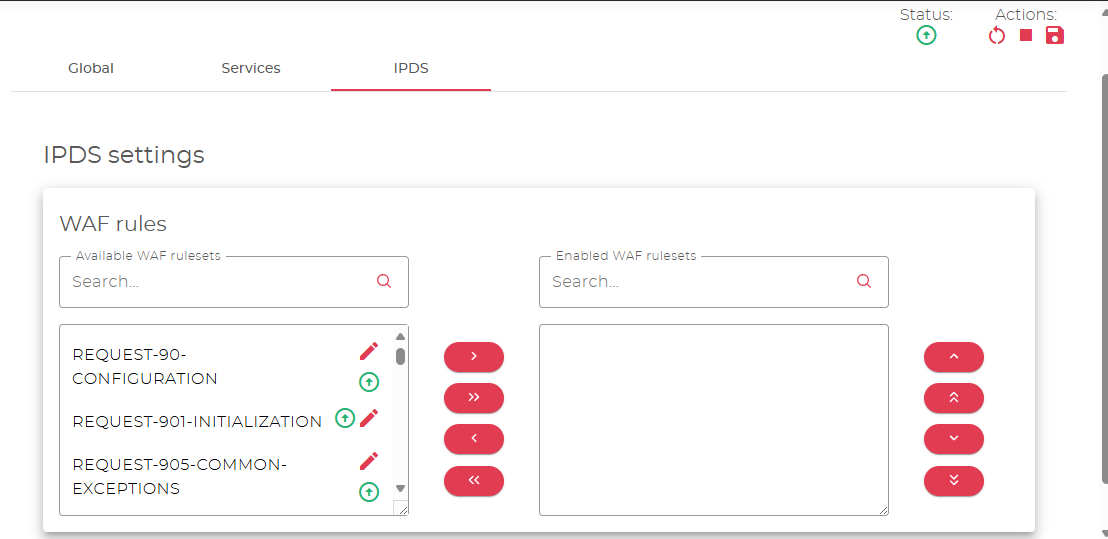
8. Protect the Website
- Under “IPDS” menu on
Farms- Move rules from WAF Rules to the Right
- Make sure rules
REQUEST-90-CONFIGURATIONon the top list.

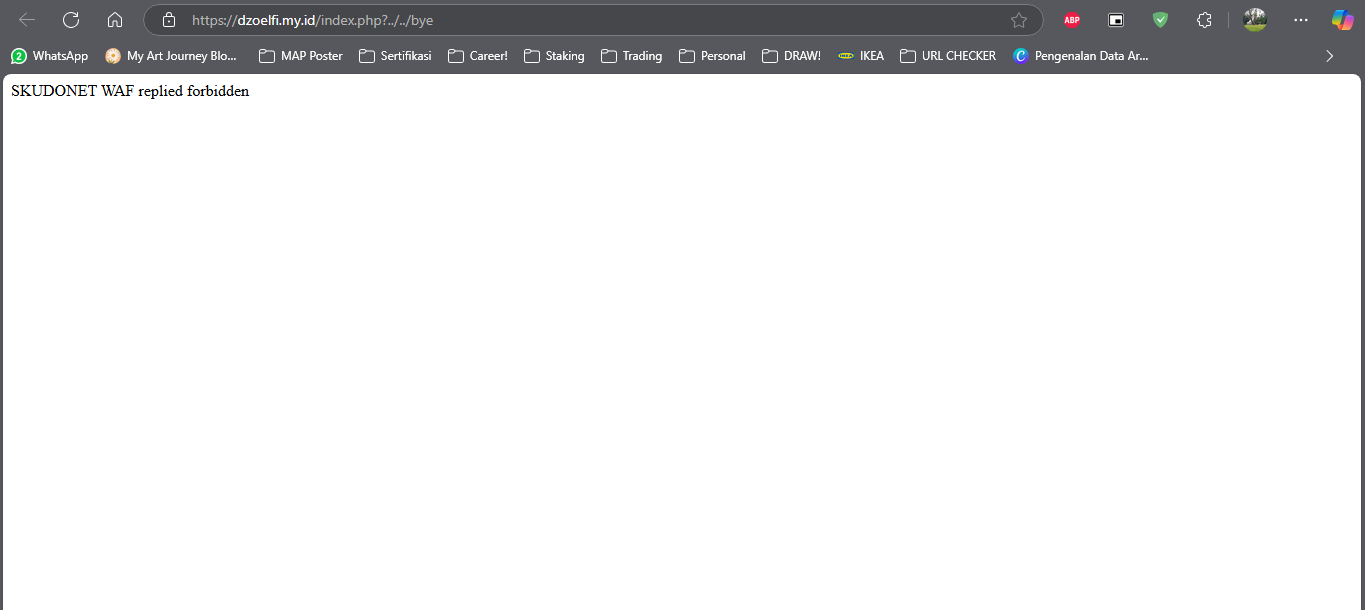
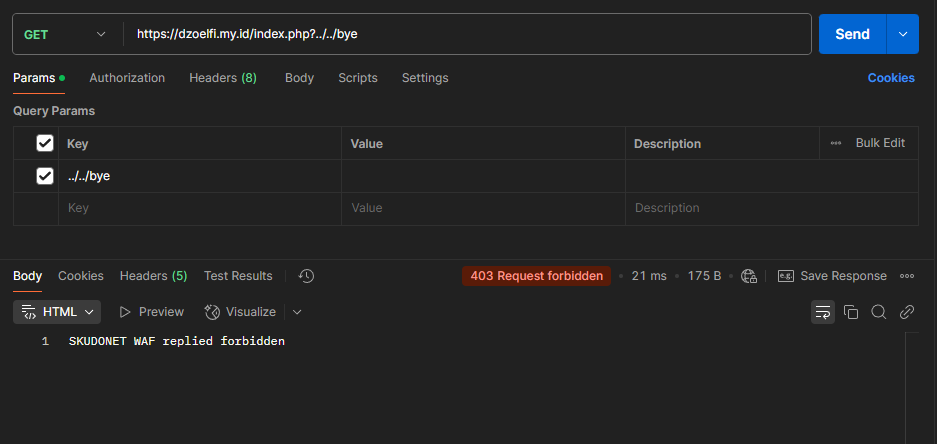
🔍 Test the Farm
From any browser or client machine, try accessing the Skudonet IP:
https://your-skudonet-ip
You should see responses alternating from the backend servers.
🧪 Tips for HTTPS Farms
- Choose
HTTPSas the profile - Upload SSL certificates under SSL Configuration
- Enable
SSL Offloadingif needed
✅ Conclusion
You’ve successfully created a load balancing farm in Skudonet CE. Farms allow flexible configuration for balancing traffic at L4 or L7, and can be enhanced with SSL offloading, persistence, and monitoring.
In future articles, we’ll explore configuring WAF, clustering, and API automation.